Quick Start Guide - SMS Gateway
This Quick start guide is about to explain how to send your first SMS in just a few steps with Ozeki SMS Gateway. This guide provides you the capability to configure your SMS modem to send or receive an SMS message successfully. The following steps will guide you through the process of setting up an Ozeki SMS Modem.
How to send SMS with Ozeki modem (quick steps)
To send SMS with an Ozeki modem:
- Check the prerequisites
- Launch Ozeki SMS Gateway and login
- Install new SMS Modem
- Set up your Modem
- Send test SMS with the Ozeki modem
Driver installation (Video tutorial)
In this video guide, you will see how to install the Ozeki Modem Drivers. The guide starts from the downloaded files and at the end, you will have your drivers installed. You can download them after you have activated your product on myozeki.com.
Modem installation (Video tutorial)
The following video contains information on how to set up your Ozeki Modem. The video starts with Ozeki Software Platform and Drivers already installed. By the end of the video, you will understand how to set up a new modem in Ozeki SMS Gateway and know basic configuration steps.
Requirements


|
SIM card: To use all the functionality of Ozeki SMS Gateway, first you need a mobile subscription that comes with a SIM card. This SIM card will provide you a telephone number, that is crucial to send and receive SMS messages with Ozeki SMS Gateway. |

|
Ozeki modem: A special type of modem, that accepts SIM cards. The modem can be connected to your PC via a data cable and used as a broadcaster for your messages. The Ozeki modem is available directly from Ozeki Ltd. |

|
Data cable: To connect your Ozeki modem to the PC, you just need a simple USB data cable that is provided for each modem that have been ordered from Ozeki Ltd. |

|
Ozeki SMS Gateway: You need to download Ozeki SMS Gateway from |
| Ozeki SMS Gateway can be obtained from the download page: Download Ozeki SMS Gateway! |
| Setup instructions for the modem are available at: Installation of an SMS modem |
Download the Modem Drivers
To use the Ozeki Modems, you will need to install the Ozeki Modem Drivers, you can download them after activating your product on myozeki.com.
Install the Modem Drivers
To install the Modem Drivers, open the folder containing the downloaded files. Extract the downloaded files into a new folder and locate the Driver Executable File. Double click on it to start the installer, if prompted to allow Administrator rights, click on Allow.
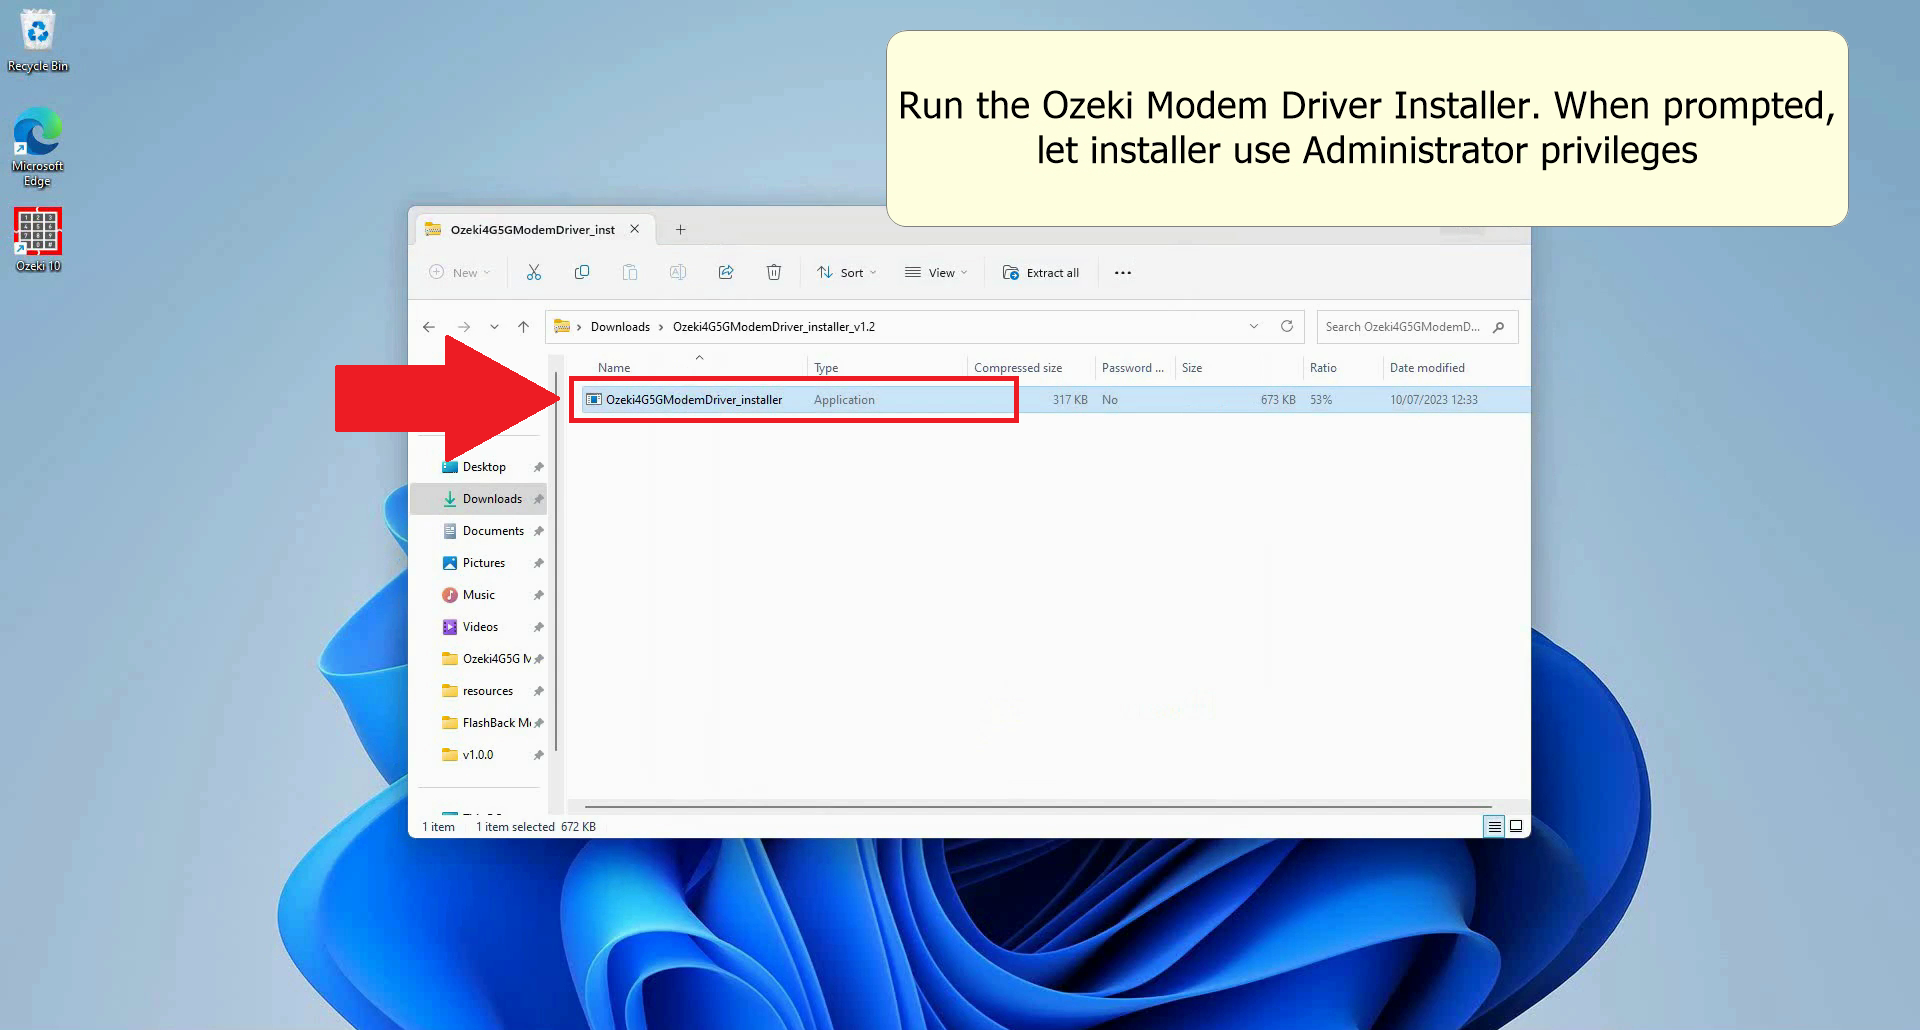
Start installing the Drivers
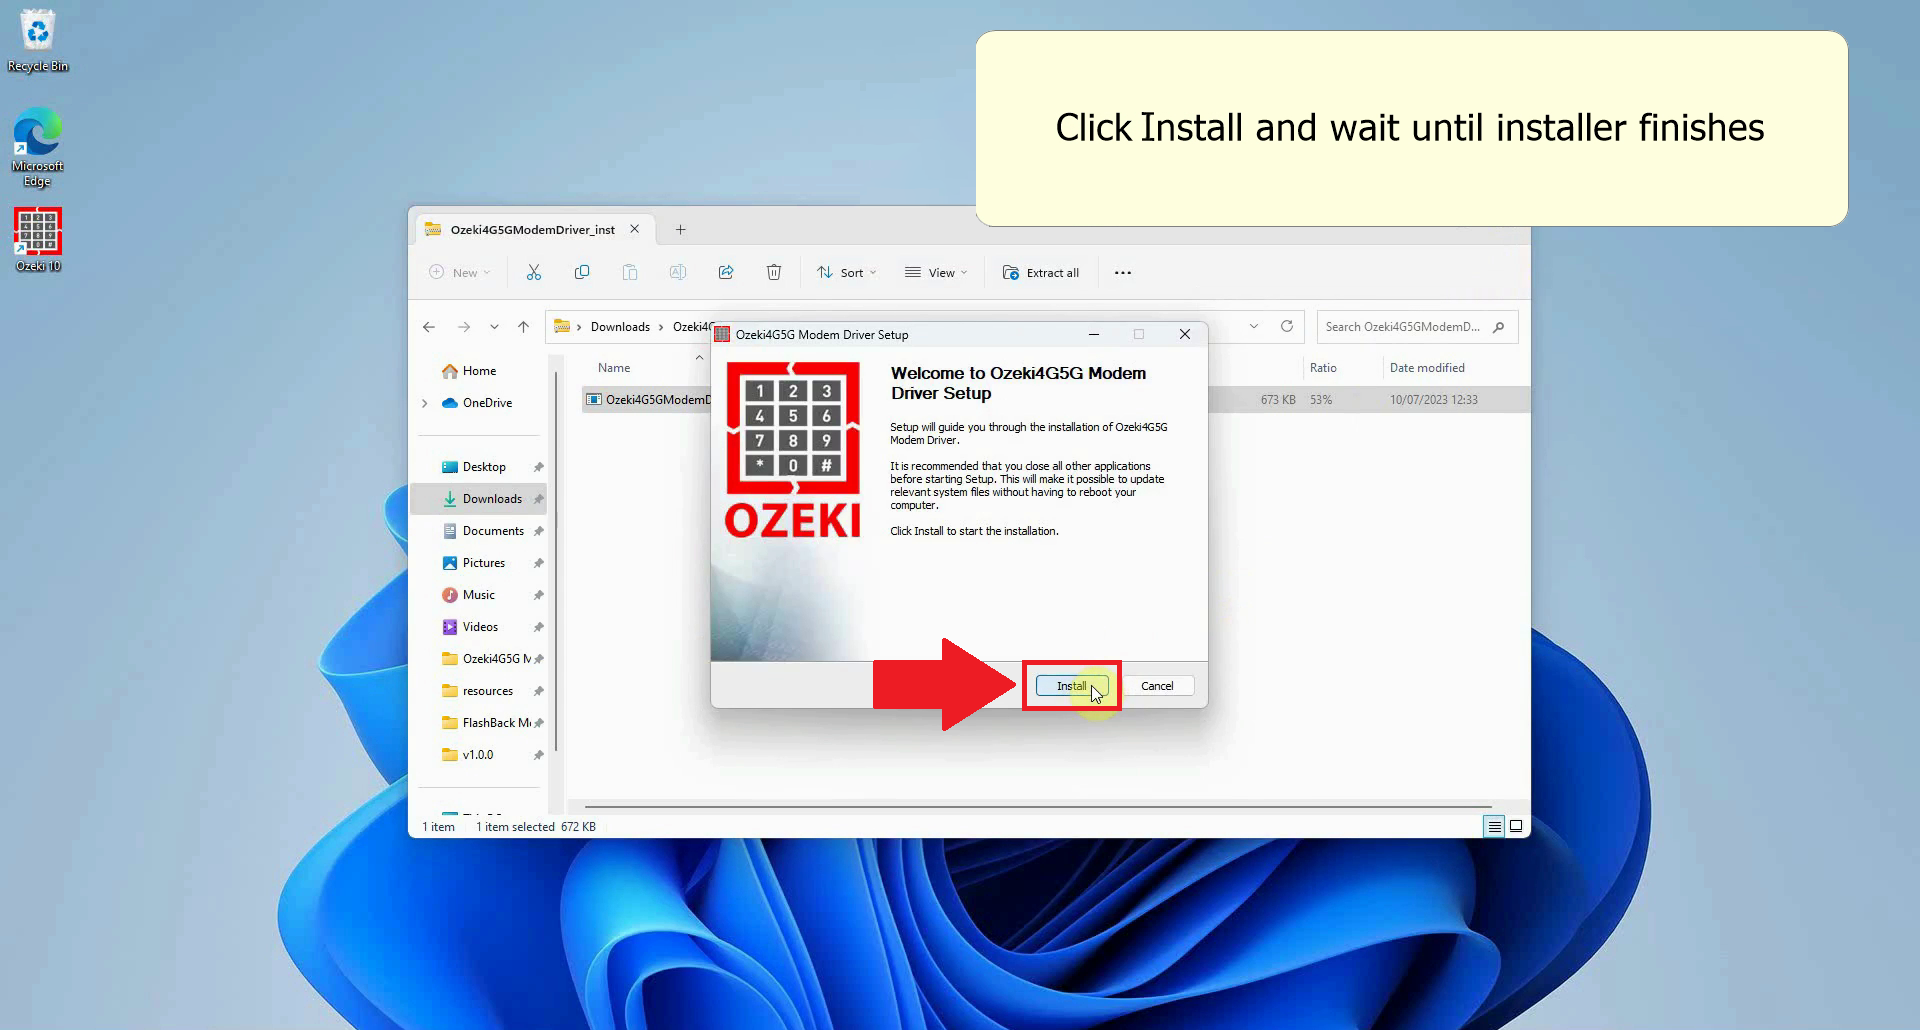
To start installing the drivers, once the installer window opened, click on the Install button and wait for the process to finish. Once the installer has finished, click on the Finish button to end the setup process.
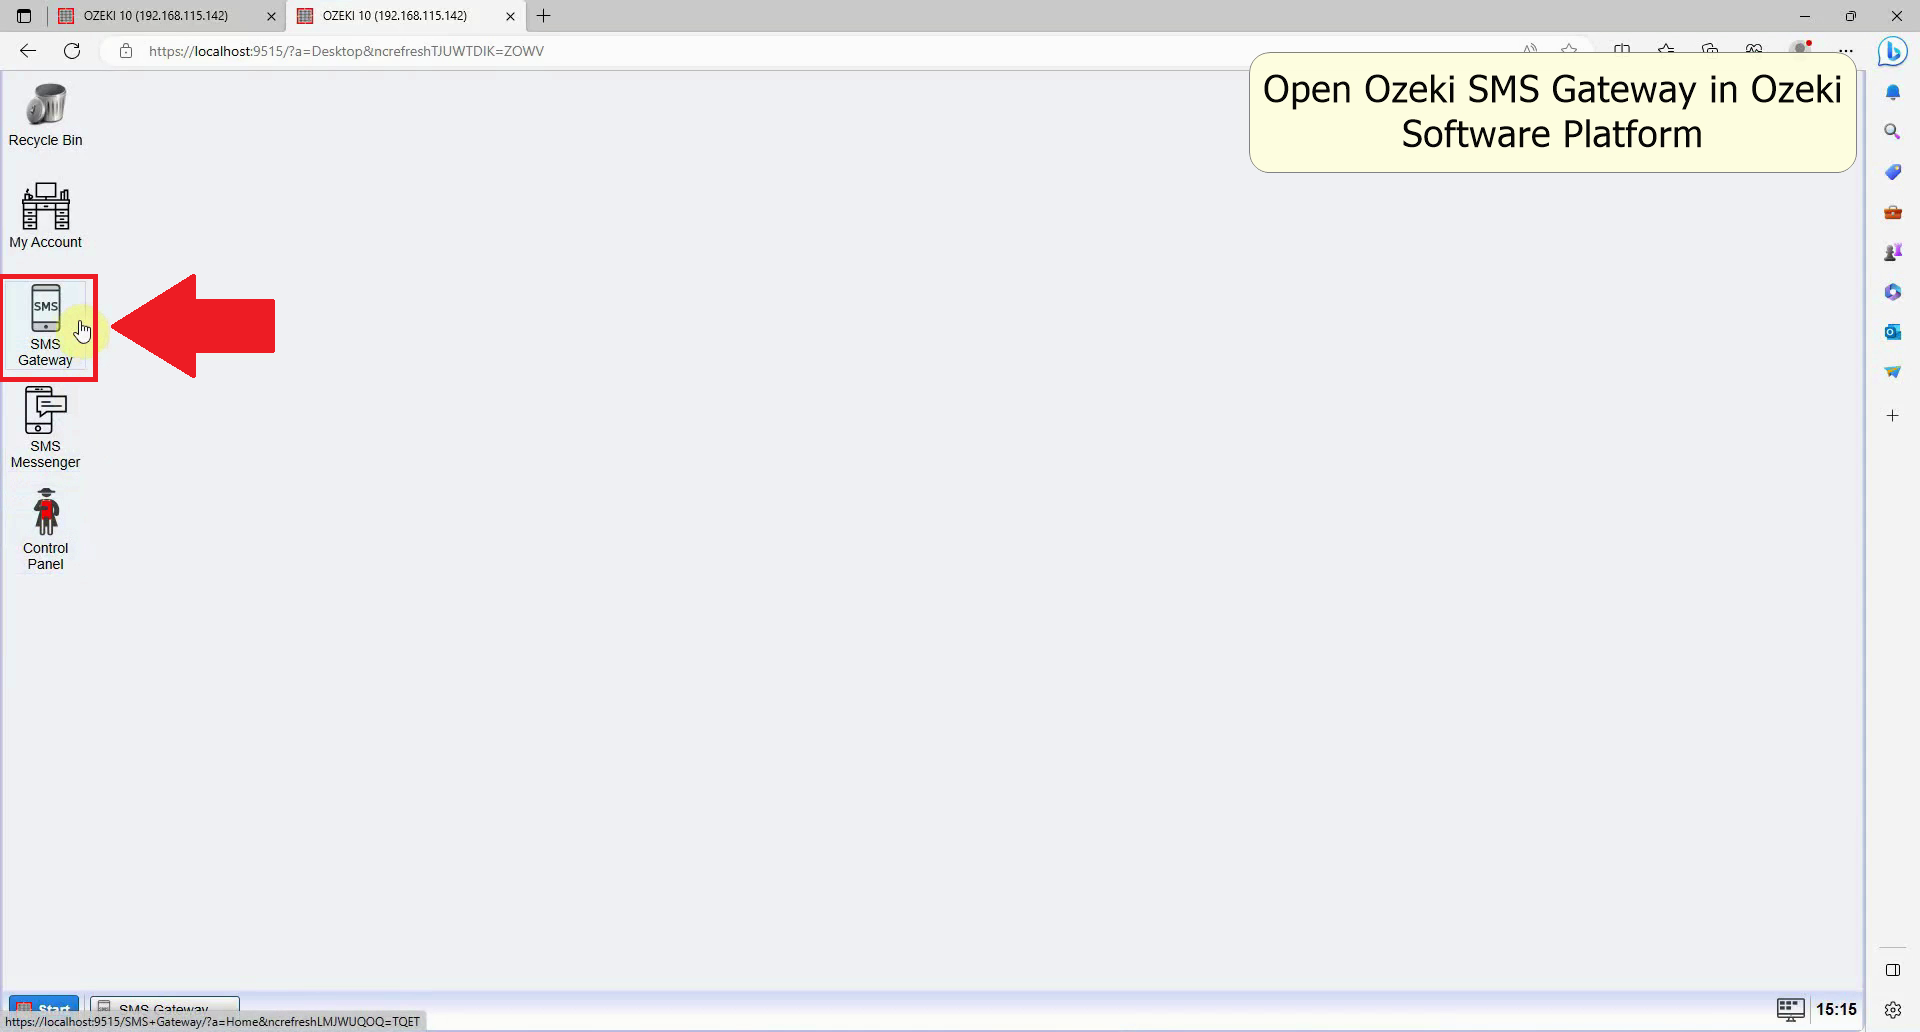
Open Ozeki SMS Gateway in Ozeki Software Platform
To open Ozeki Software Platform, you will have to click on the search element in the Taskbar of Windows, type in Ozeki 10 and click on the application. The software should start in a few seconds Open the Ozeki SMS Gateway in the Ozeki Software Platform, you have a few default apps, usually placed on the left, open SMS Gateway, it has a phone icon with SMS written inside of it. This will open the SMS Gateway Application.
if you have not yet downloaded Ozeki 10, you can download it here: Ozeki Installer Download Page
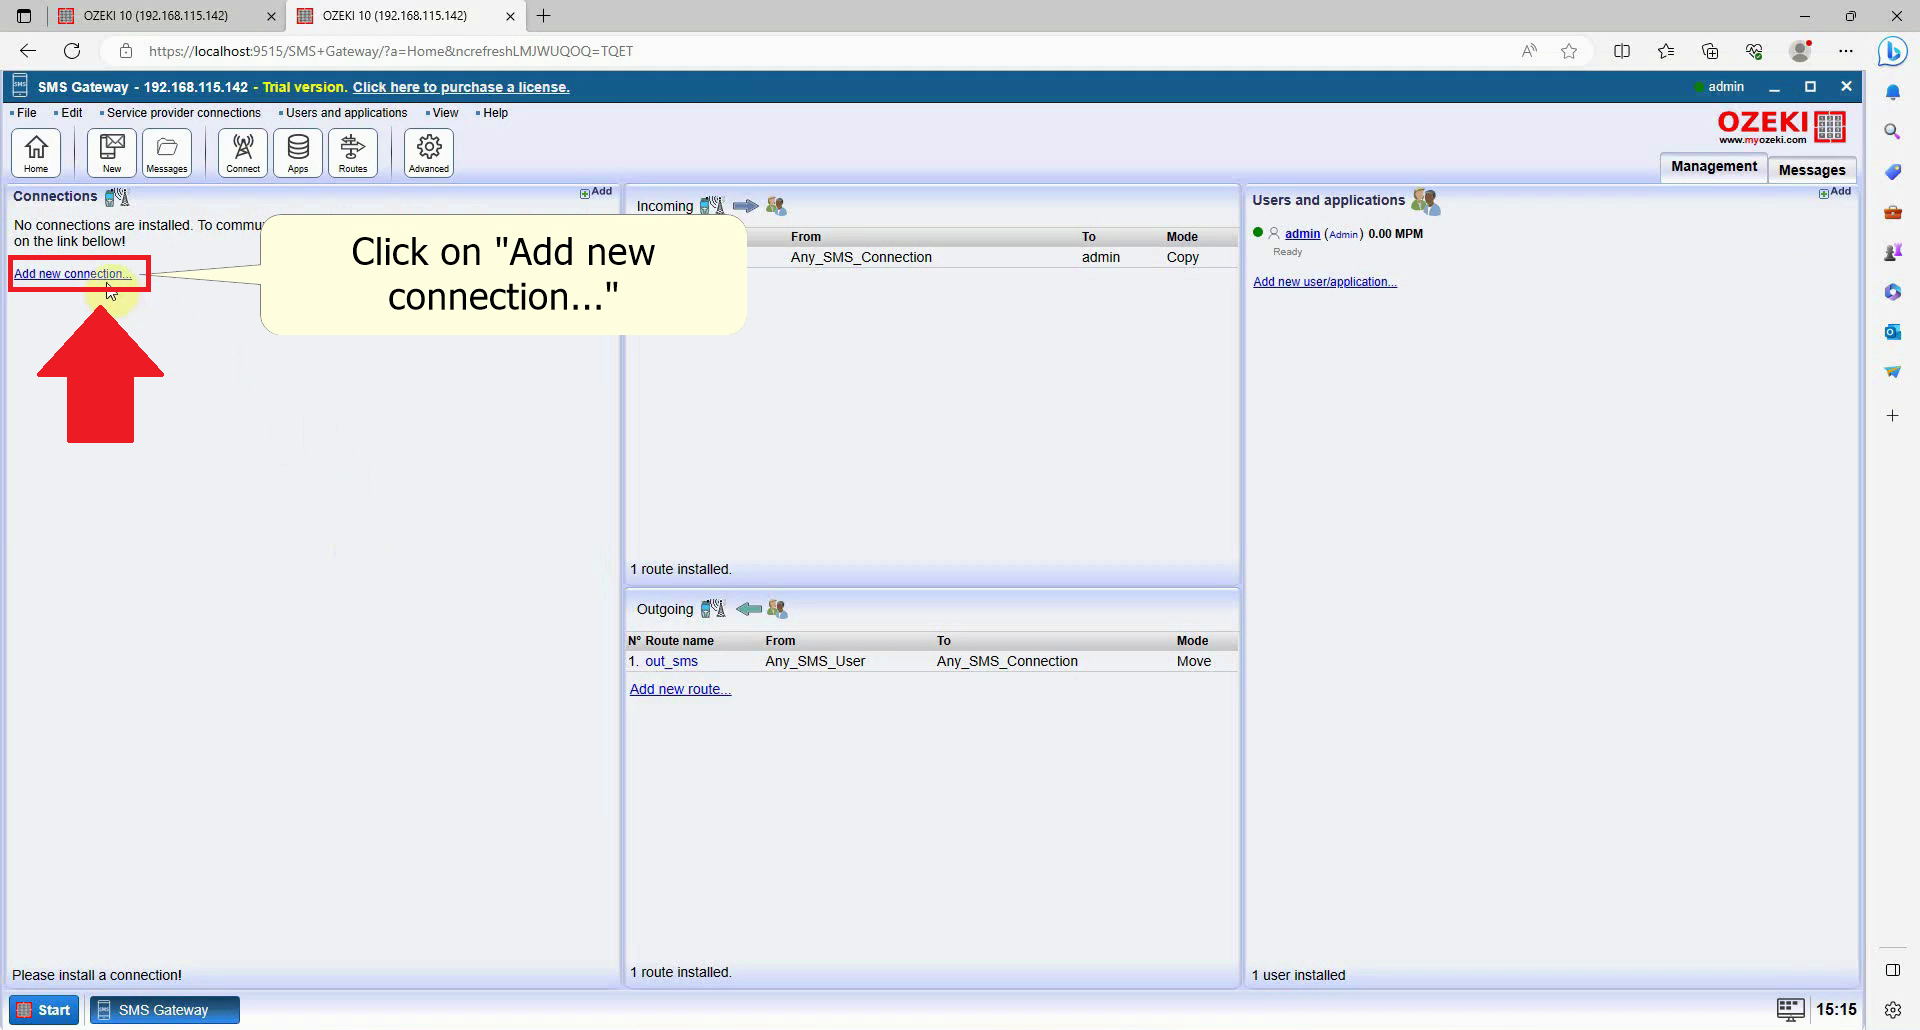
Add a new connection
To add a new connection in Ozeki SMS Gateway, find the add new connection link in the left Connections panel and click it. This will open the connection list page where you will be able to setup an SMS modem.
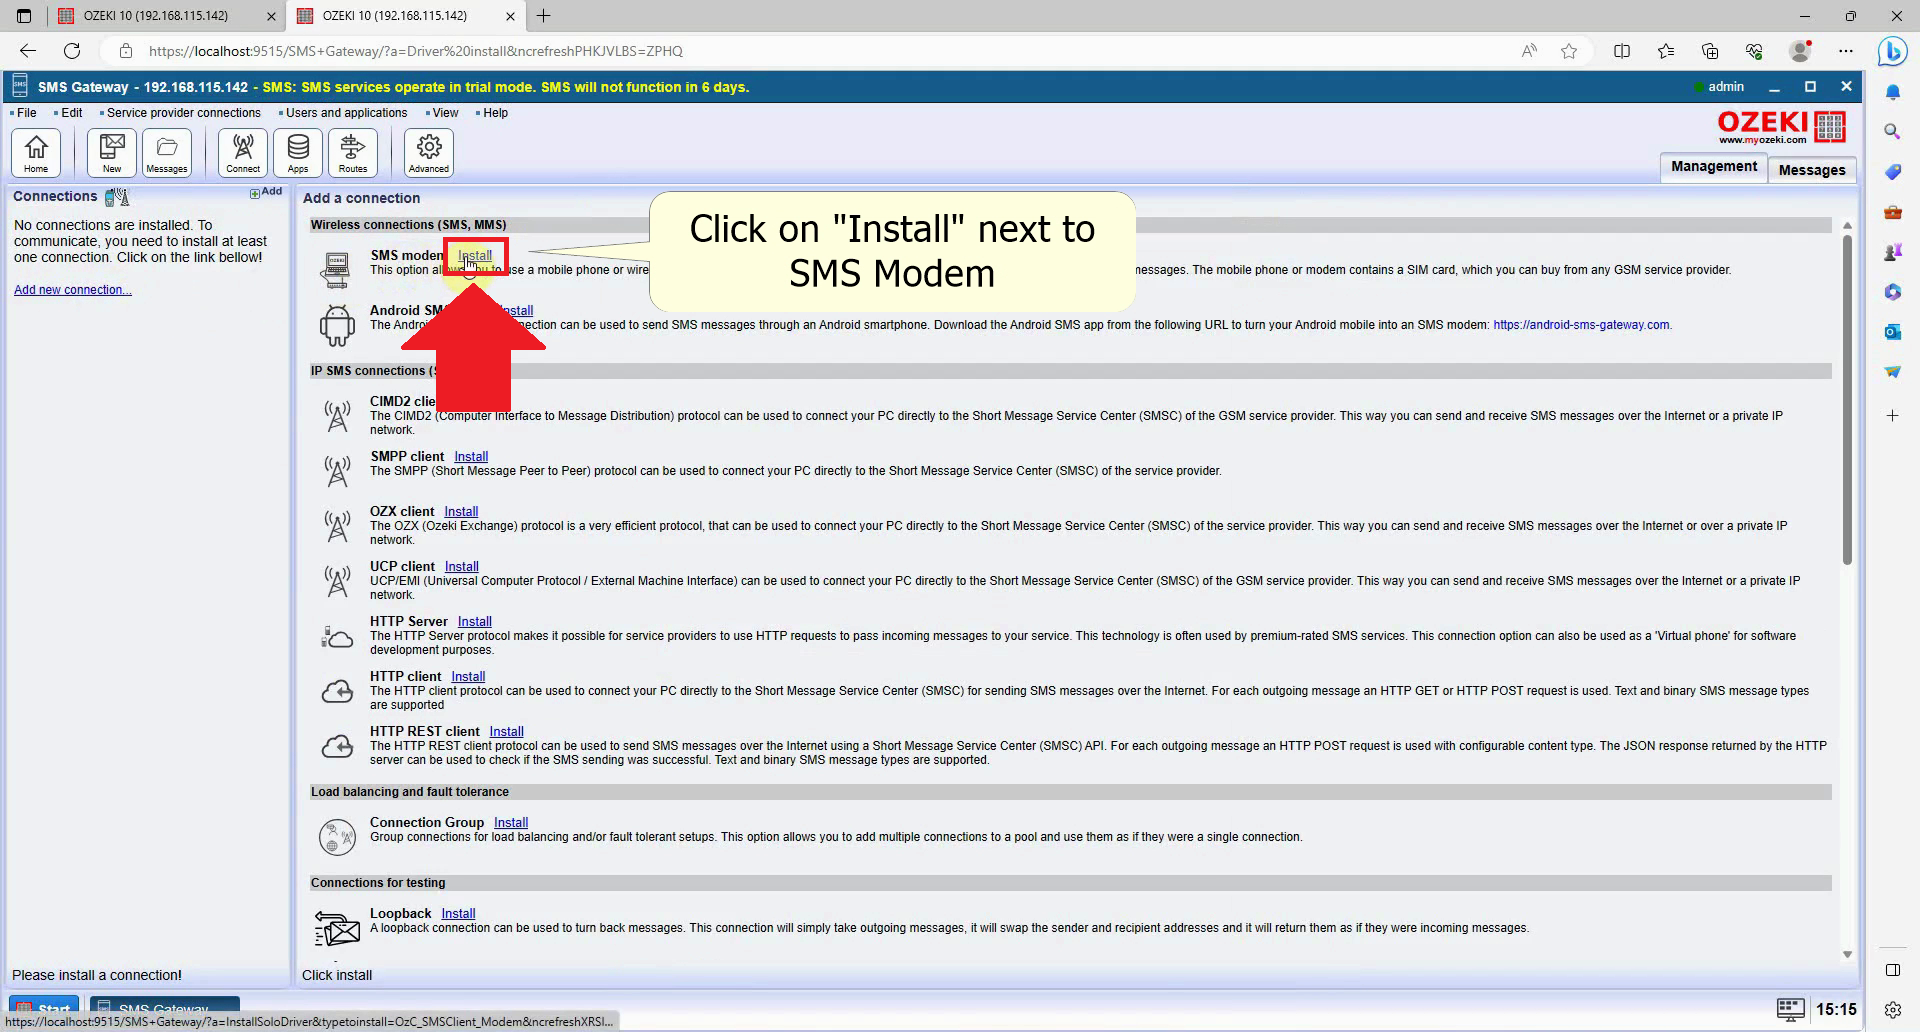
Install a new SMS Modem
In the connection list, look for SMS modem and an Install link next to it, it is at the top of the list in the Wireless Connections (SMS, MMS) group, click the link to begin setting up your SMS Gateway and send messages.
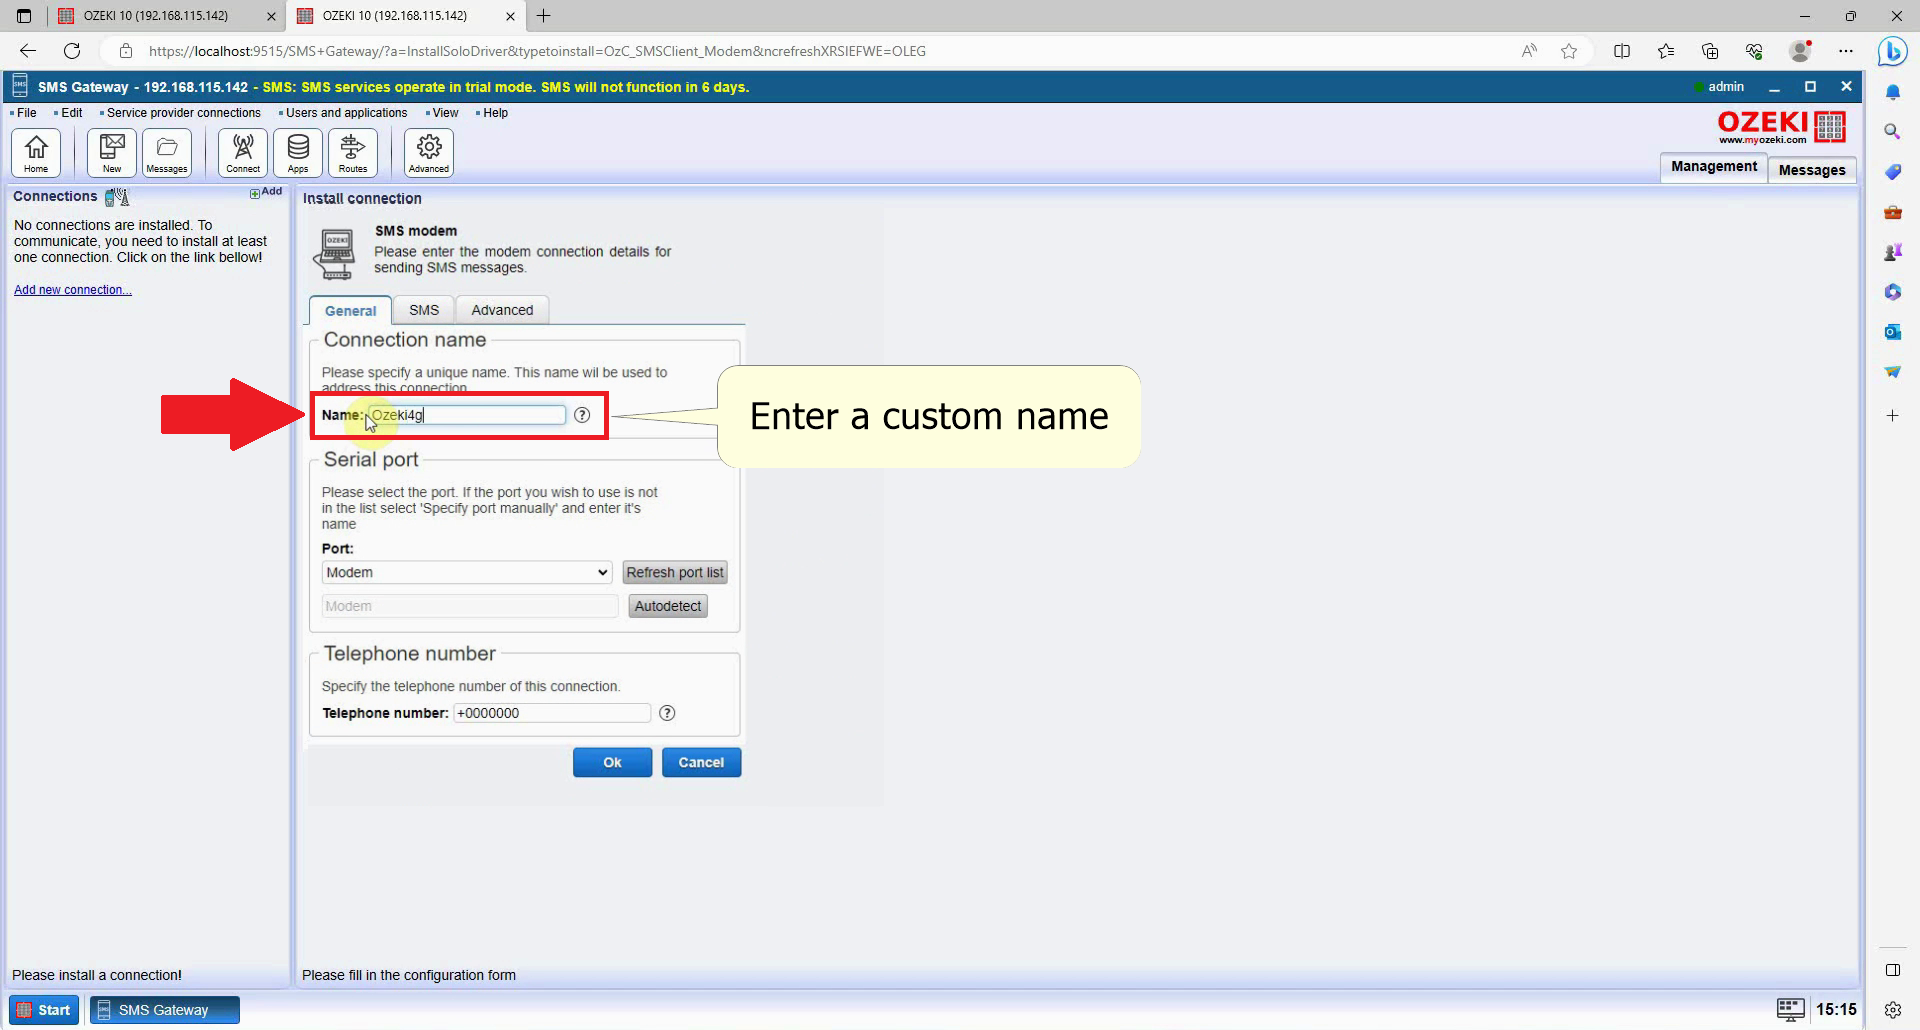
Set a name for your modem
In the settings, under the General tab, you can set a custom name for your modem, don't use special characters like questionmarks or stars, this is highly recommended to avoid confusion when you have several connections setup.
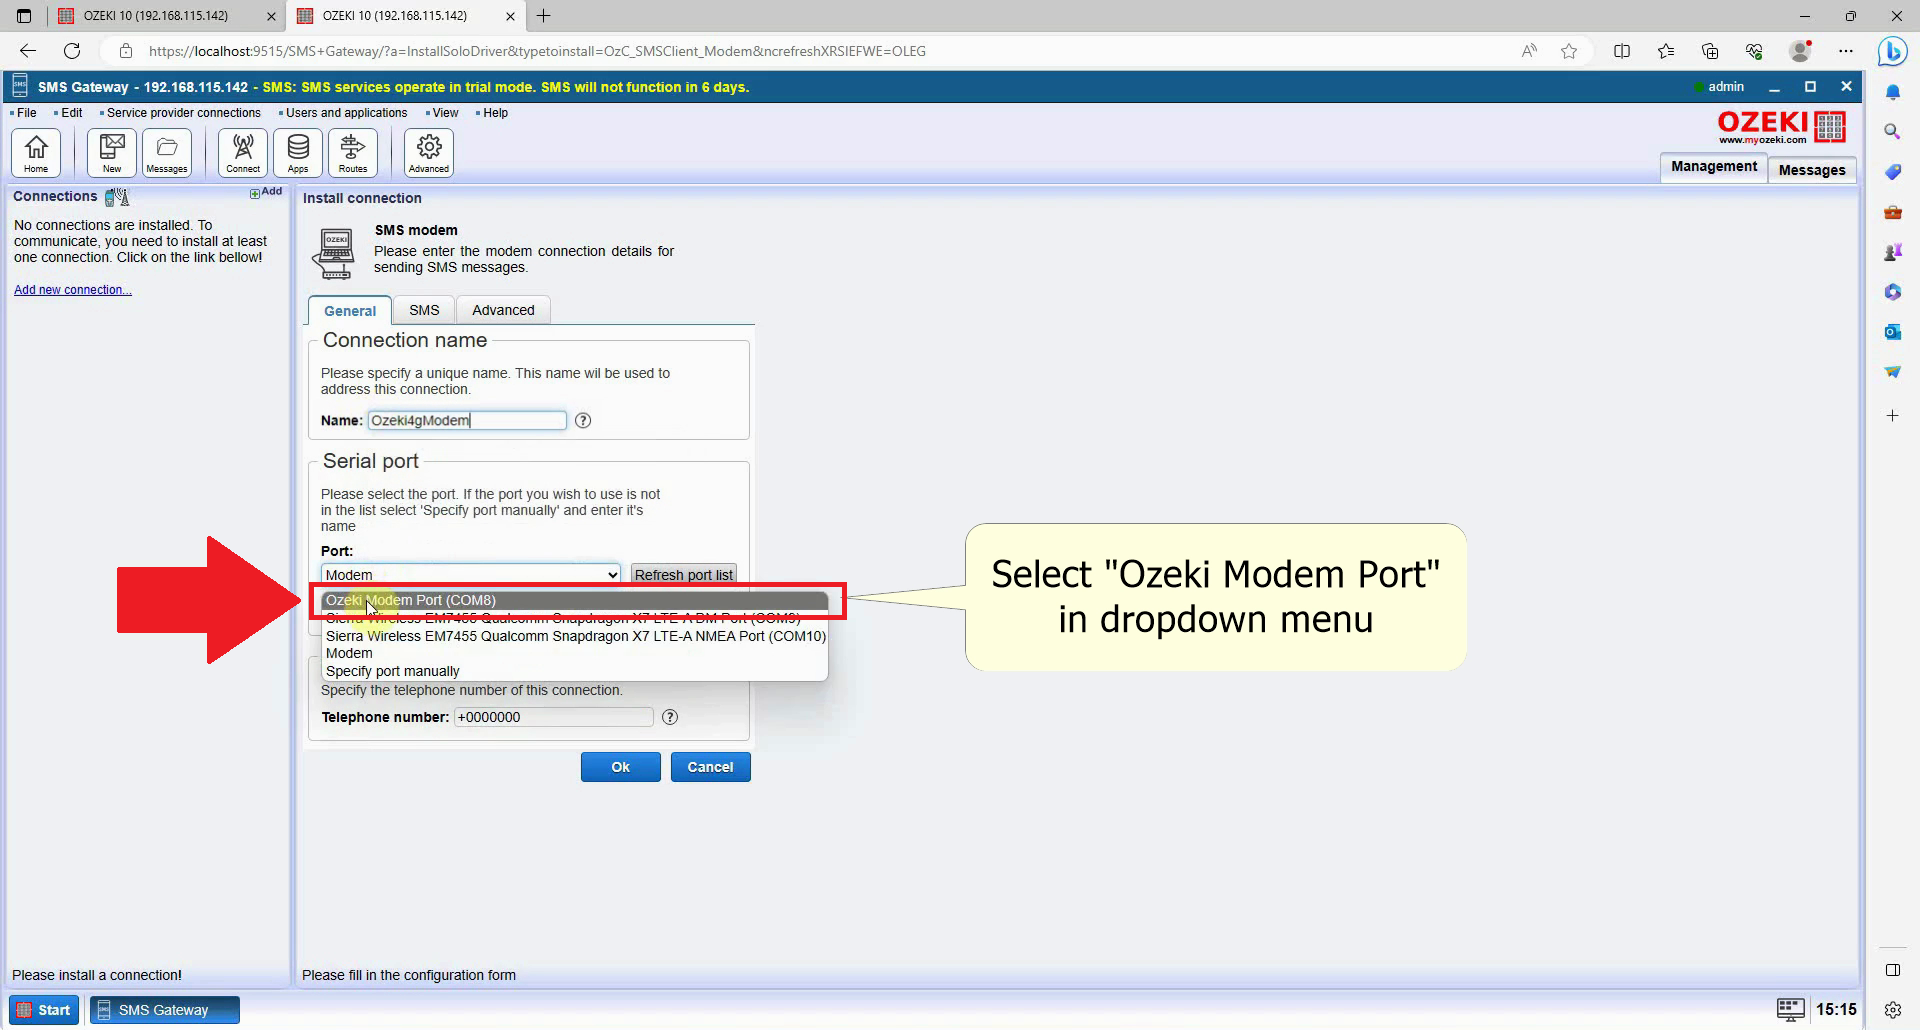
Select the Port
Under Serial port, you have to open the Port dropdown menu and look for /Ozkei Modem Port, select it to start configuring the built in modem of the Ozeki SMS Gateway PLC and send messages via 4G.
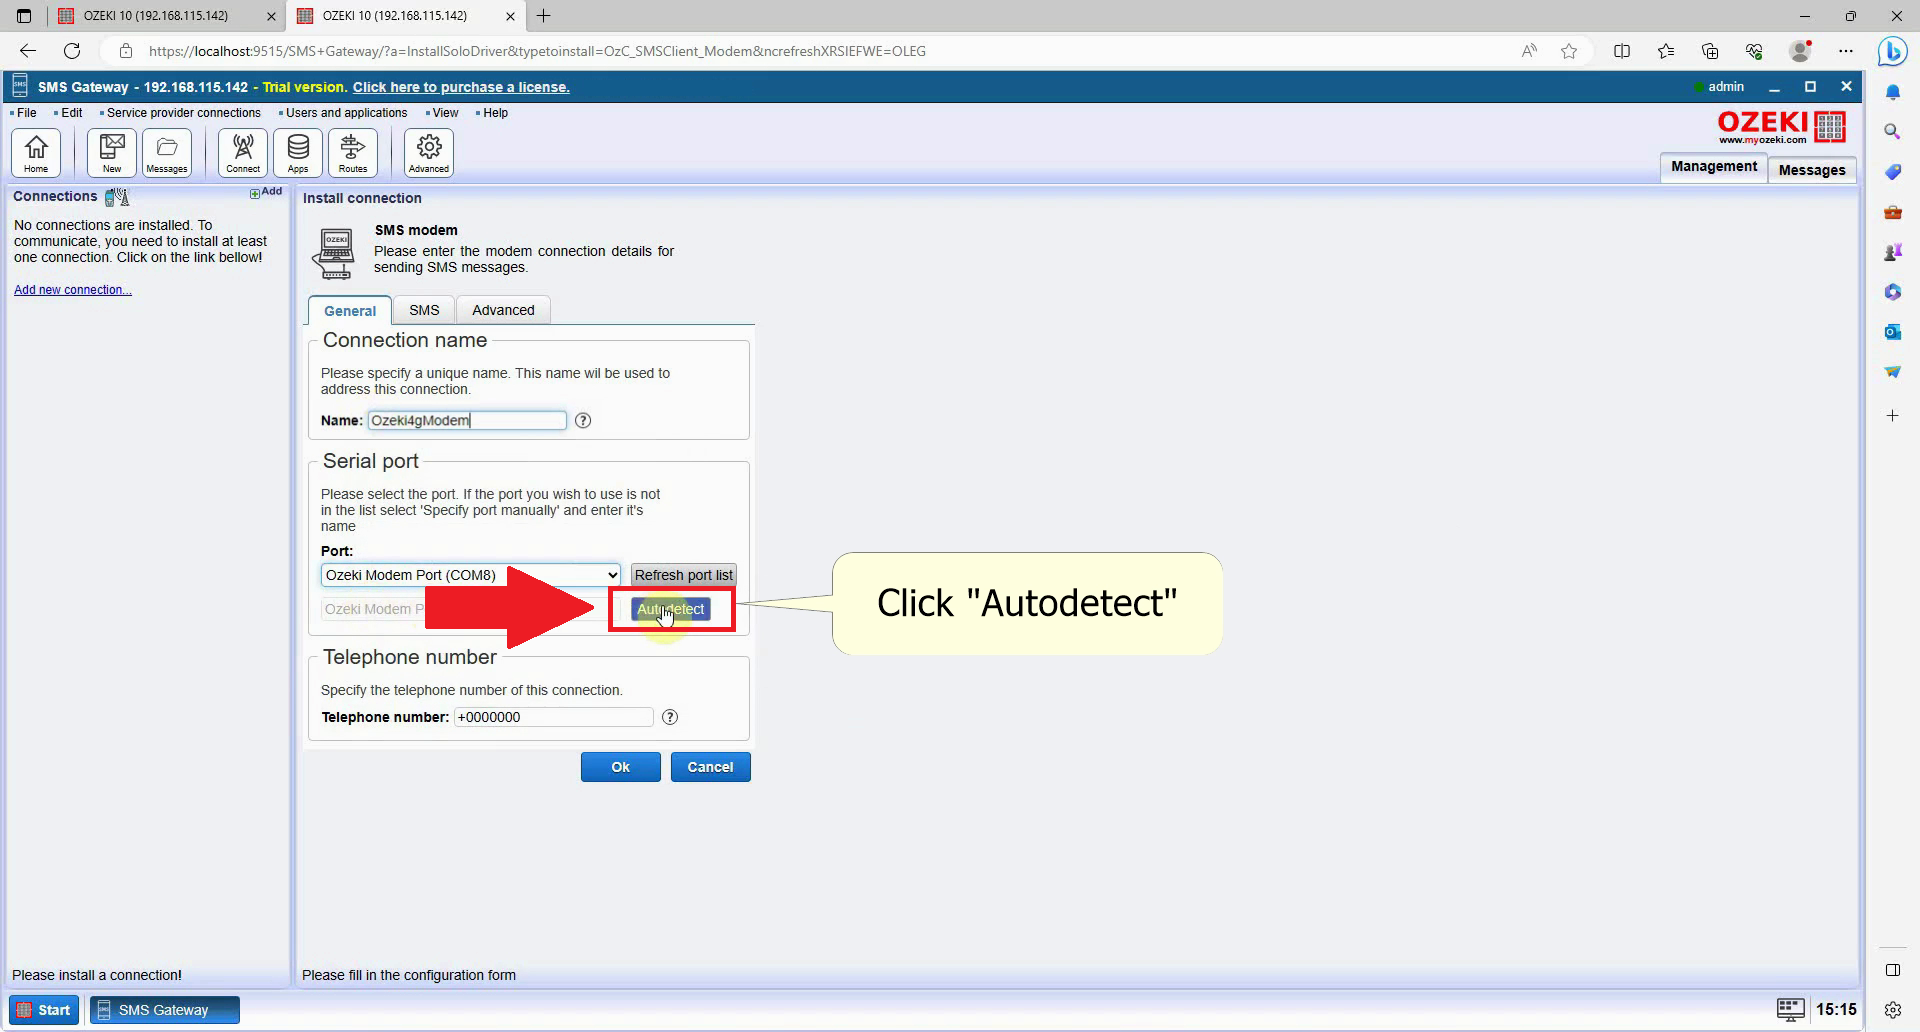
Autodetect properties
Next to the dropdown menu, find the blue button with the text Autodetect, click this button to automatically get all data from your SIM card like your phone number and configure it, it may take a few seconds.
Check the information
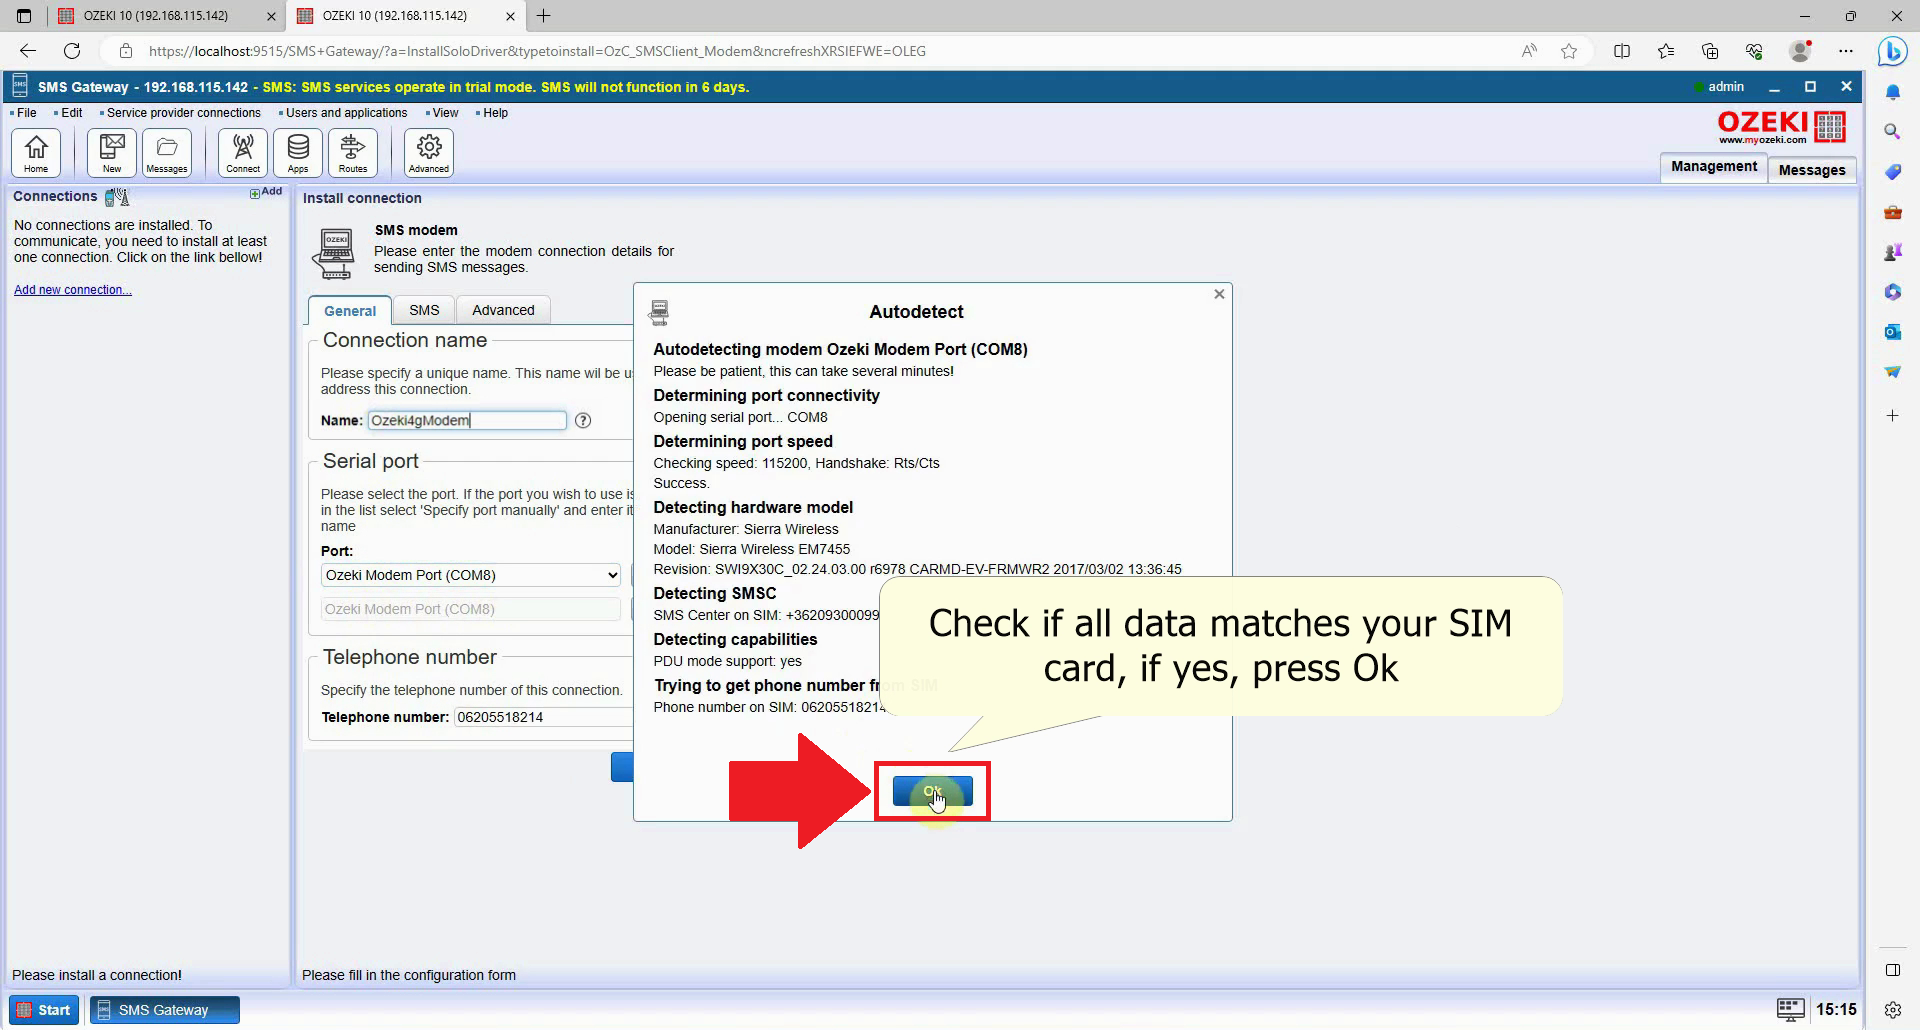
Check your details, a window will pop up named Autodetect, check if every detail matches to your SIM card, you can also see the modem details here. Click on the Ok button at the bottom when you are done checking everything. This will finish the Autodetect procedure and ready your modem for sending sms messages from your computer.
Finish setting up your modem
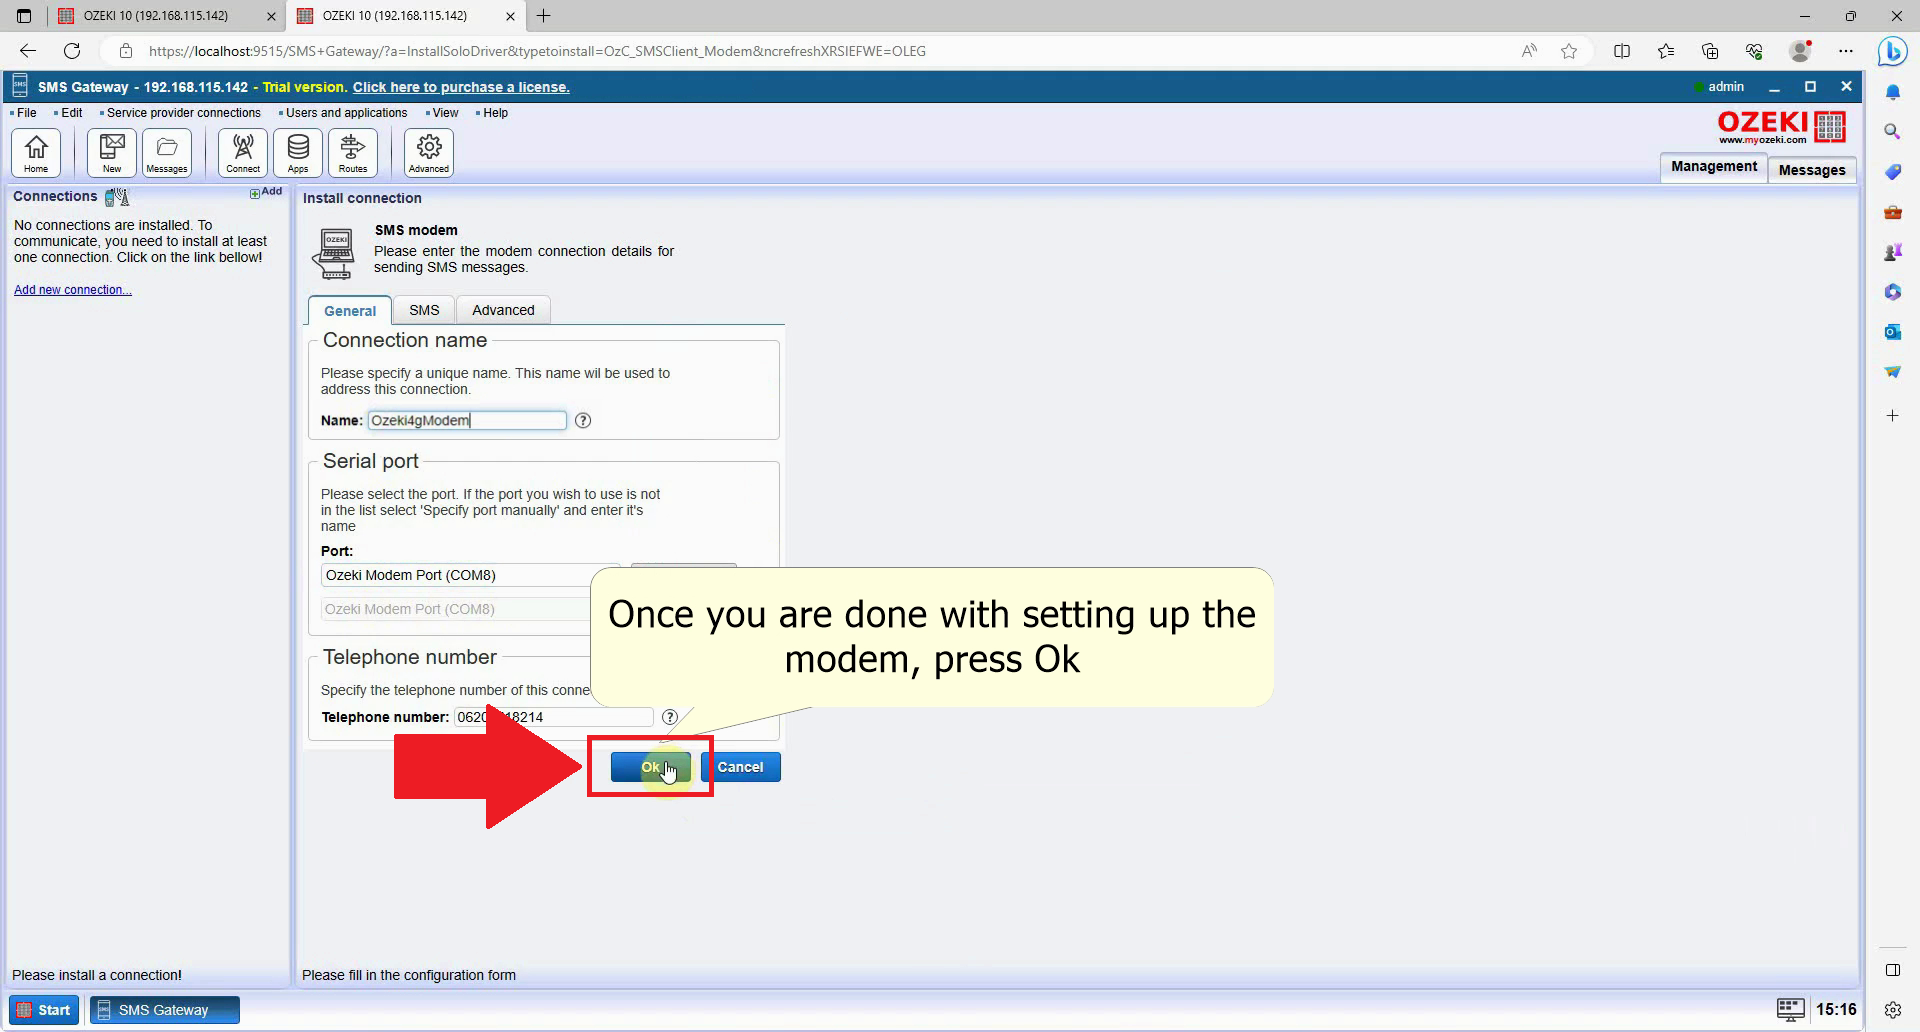
To finish setting up your modem, look for the blue Ok button at the bottom. If you wish to make other changes to your modem, you can do it now under the SMS tab or the Advanced tab, or you can come back to this tab after pressing Ok with the Configure tab later on.
Enable SMS Modem Connection
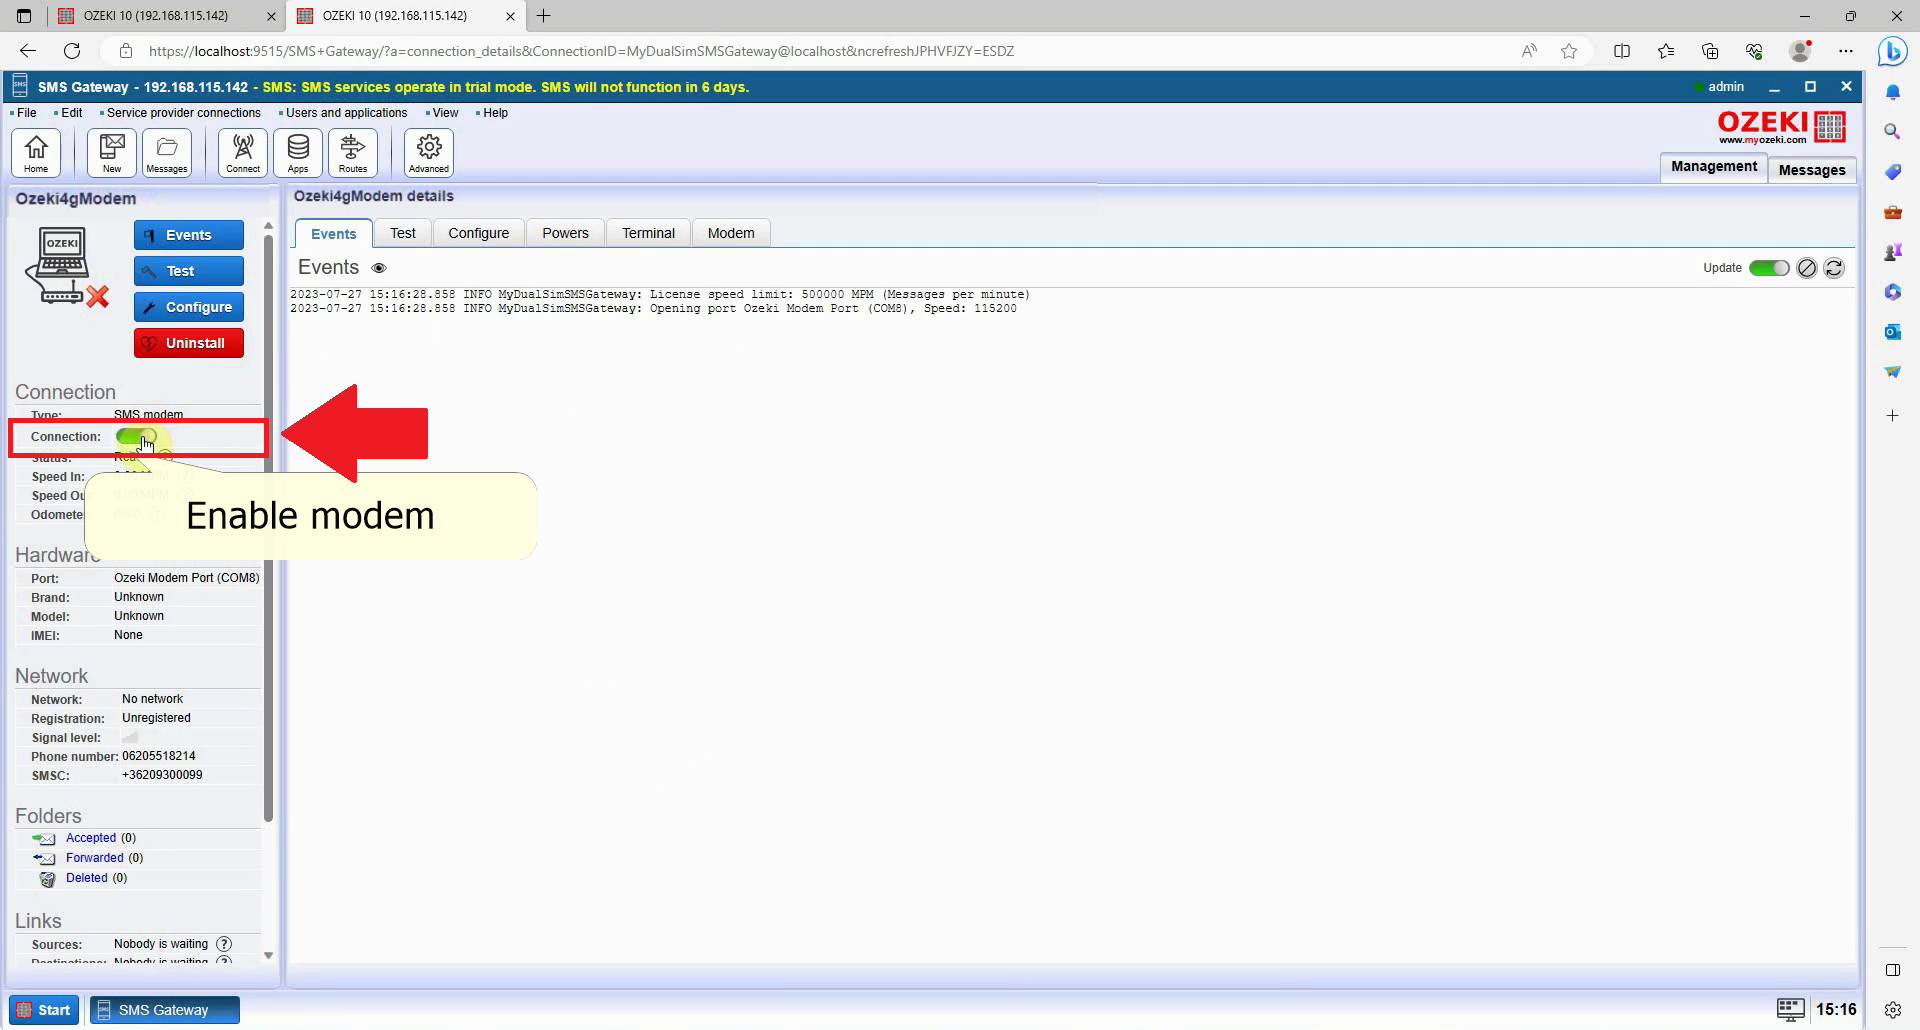
To enable SMS modem connection, find the Connection group on the left, you have to Enable the Connection switch, which is the second option in the group. Click on it to make it green and your modem will start connecting to your service provider.
Navigate to the Test panel
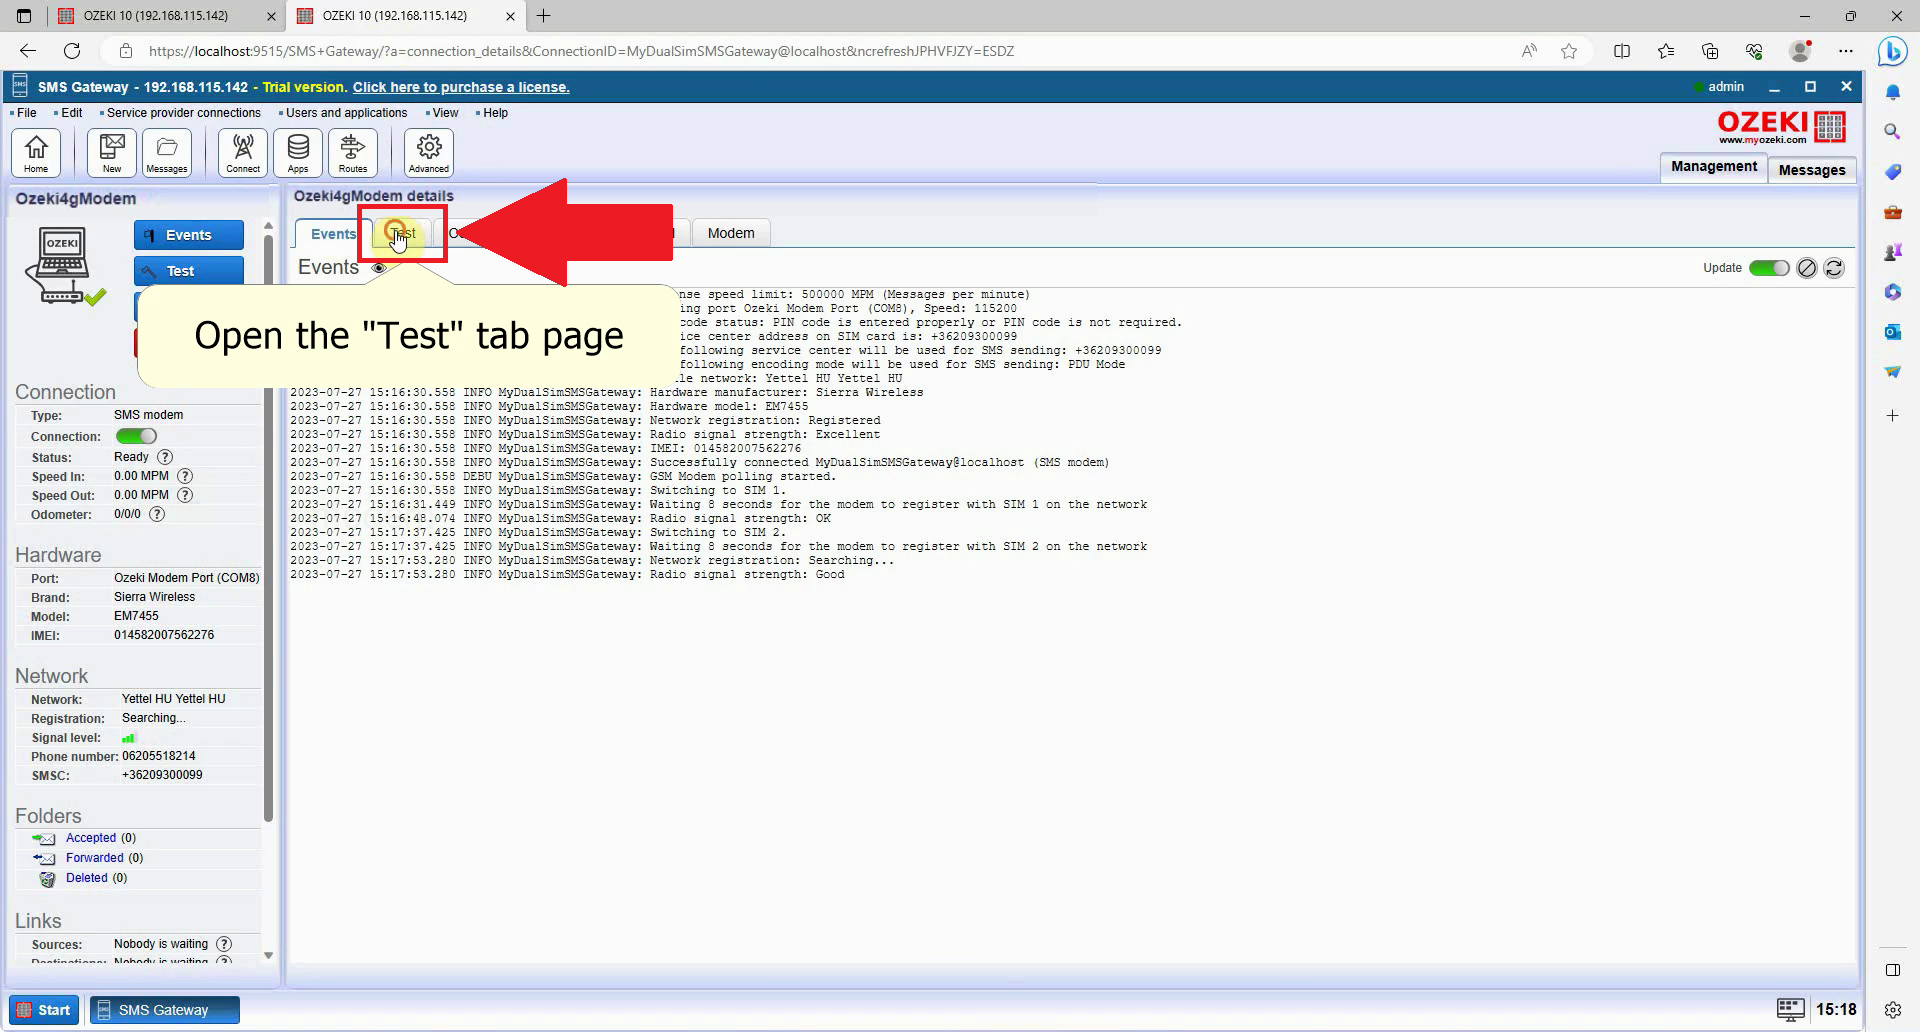
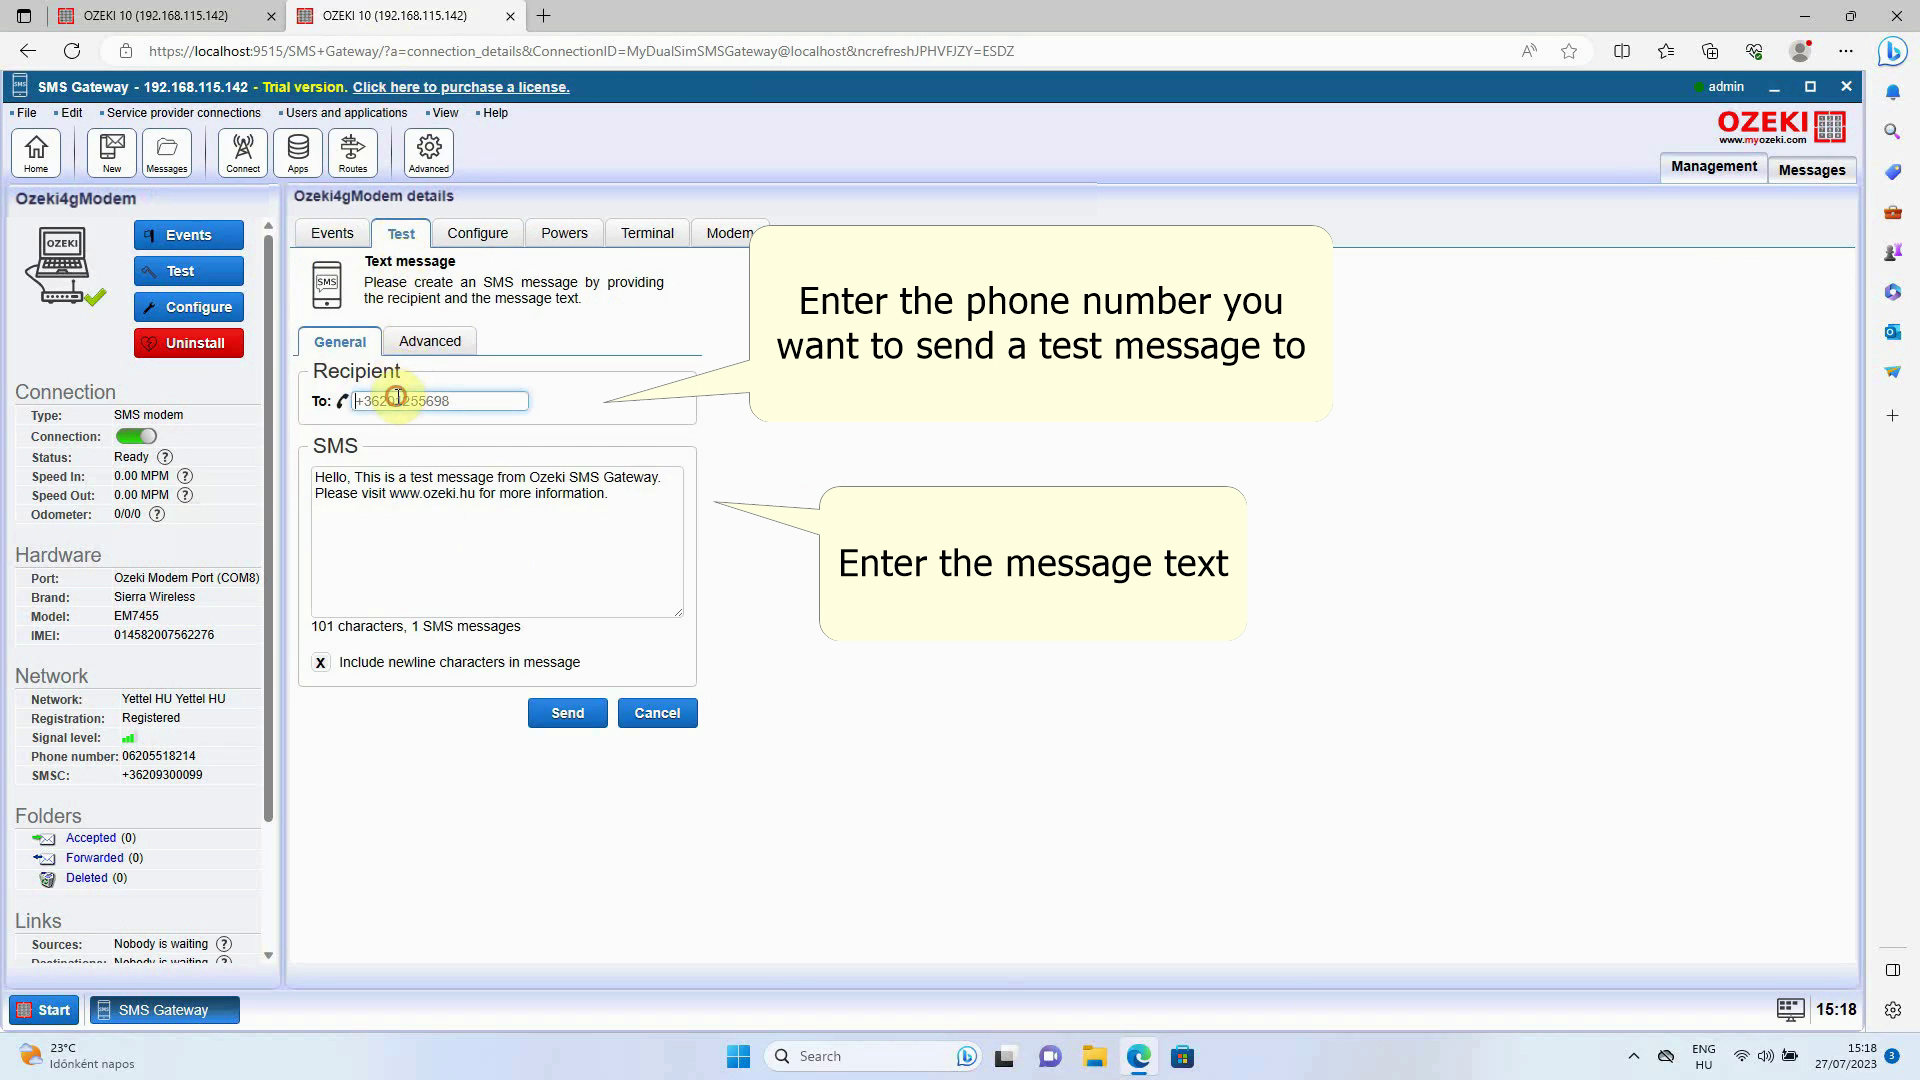
Navigate to the navigation bar in the right panel and click Test to open the Test tab page and enter the Test SMS sending page. You can send test messages from here to anyone with custom content.
Fill the recipient's address and test message
Fill in the recipient's address and enter the test message, look for the To field in the Recipient group, you can enter the phone number there, and type into the SMS textfield what you want to send. You can write whatever you want here.
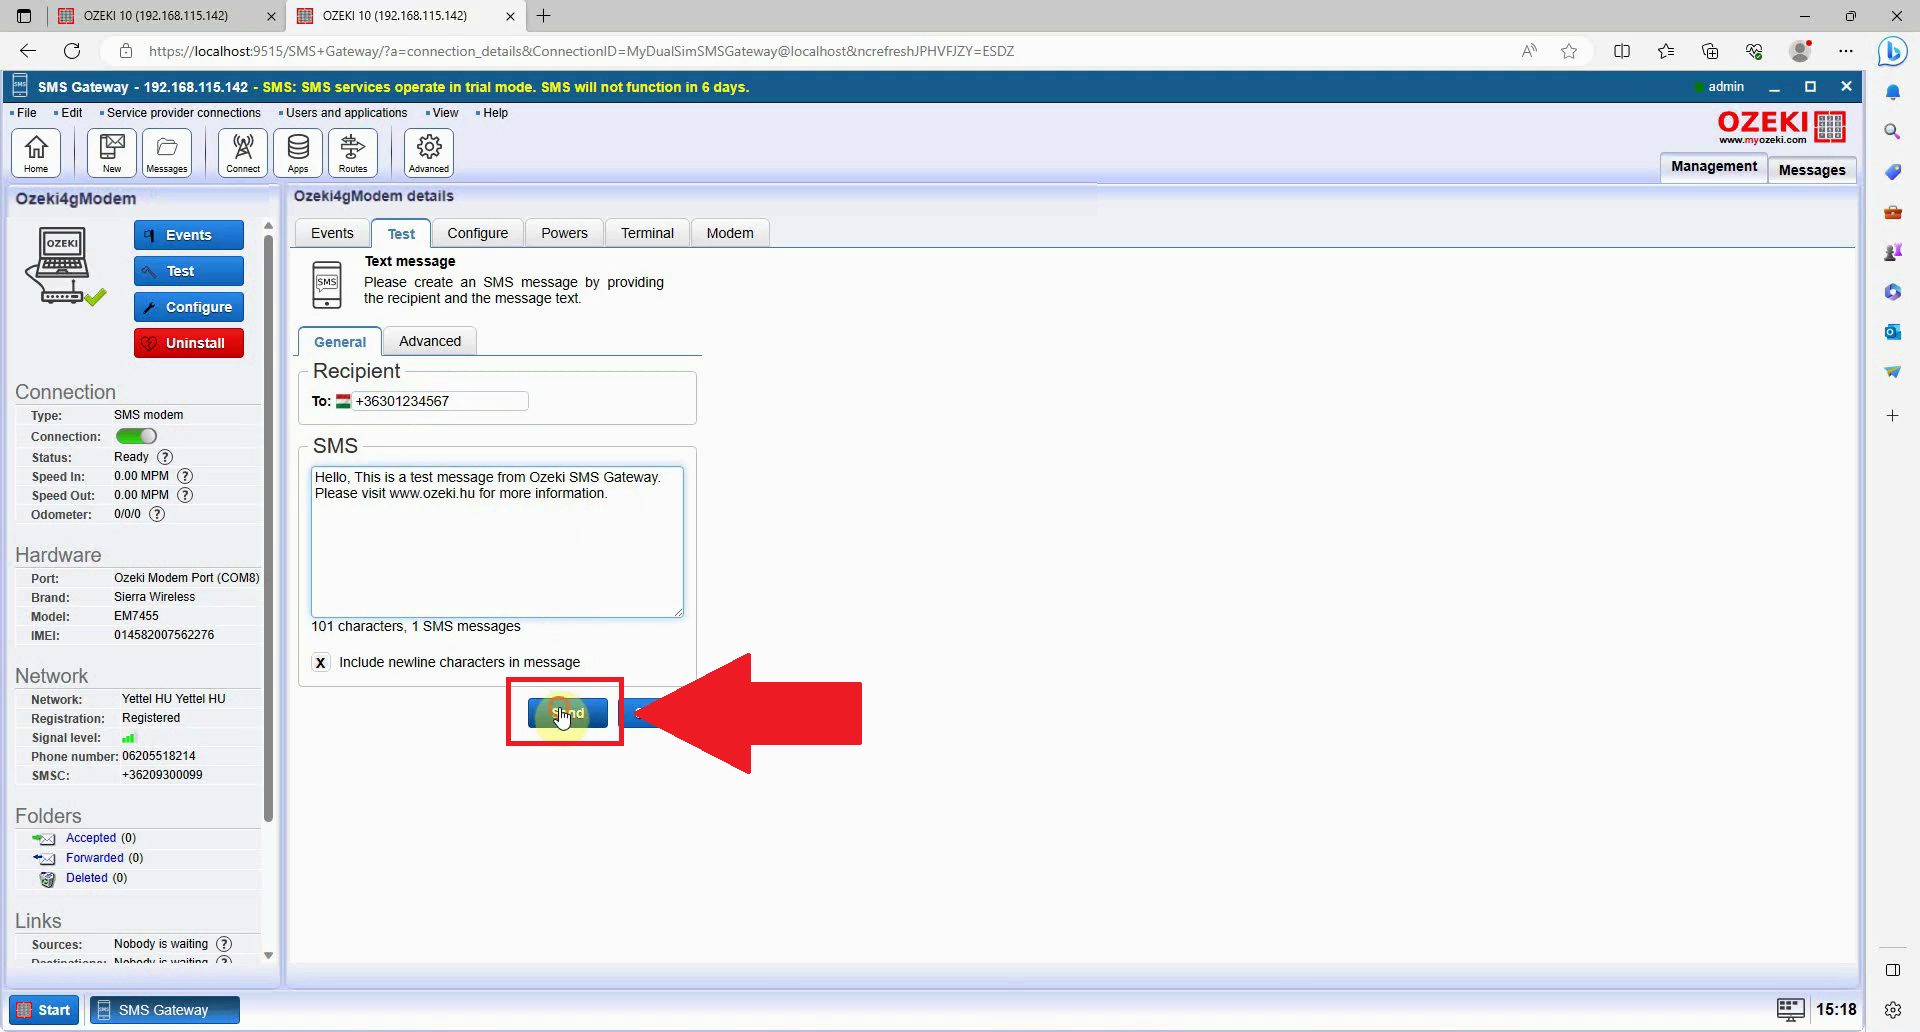
Send the SMS
Send the SMS if you are done, look for a blue Send button at the bottom of the screen. Click on the button to send the message and you will soon receive the SMS on the specified phone number.
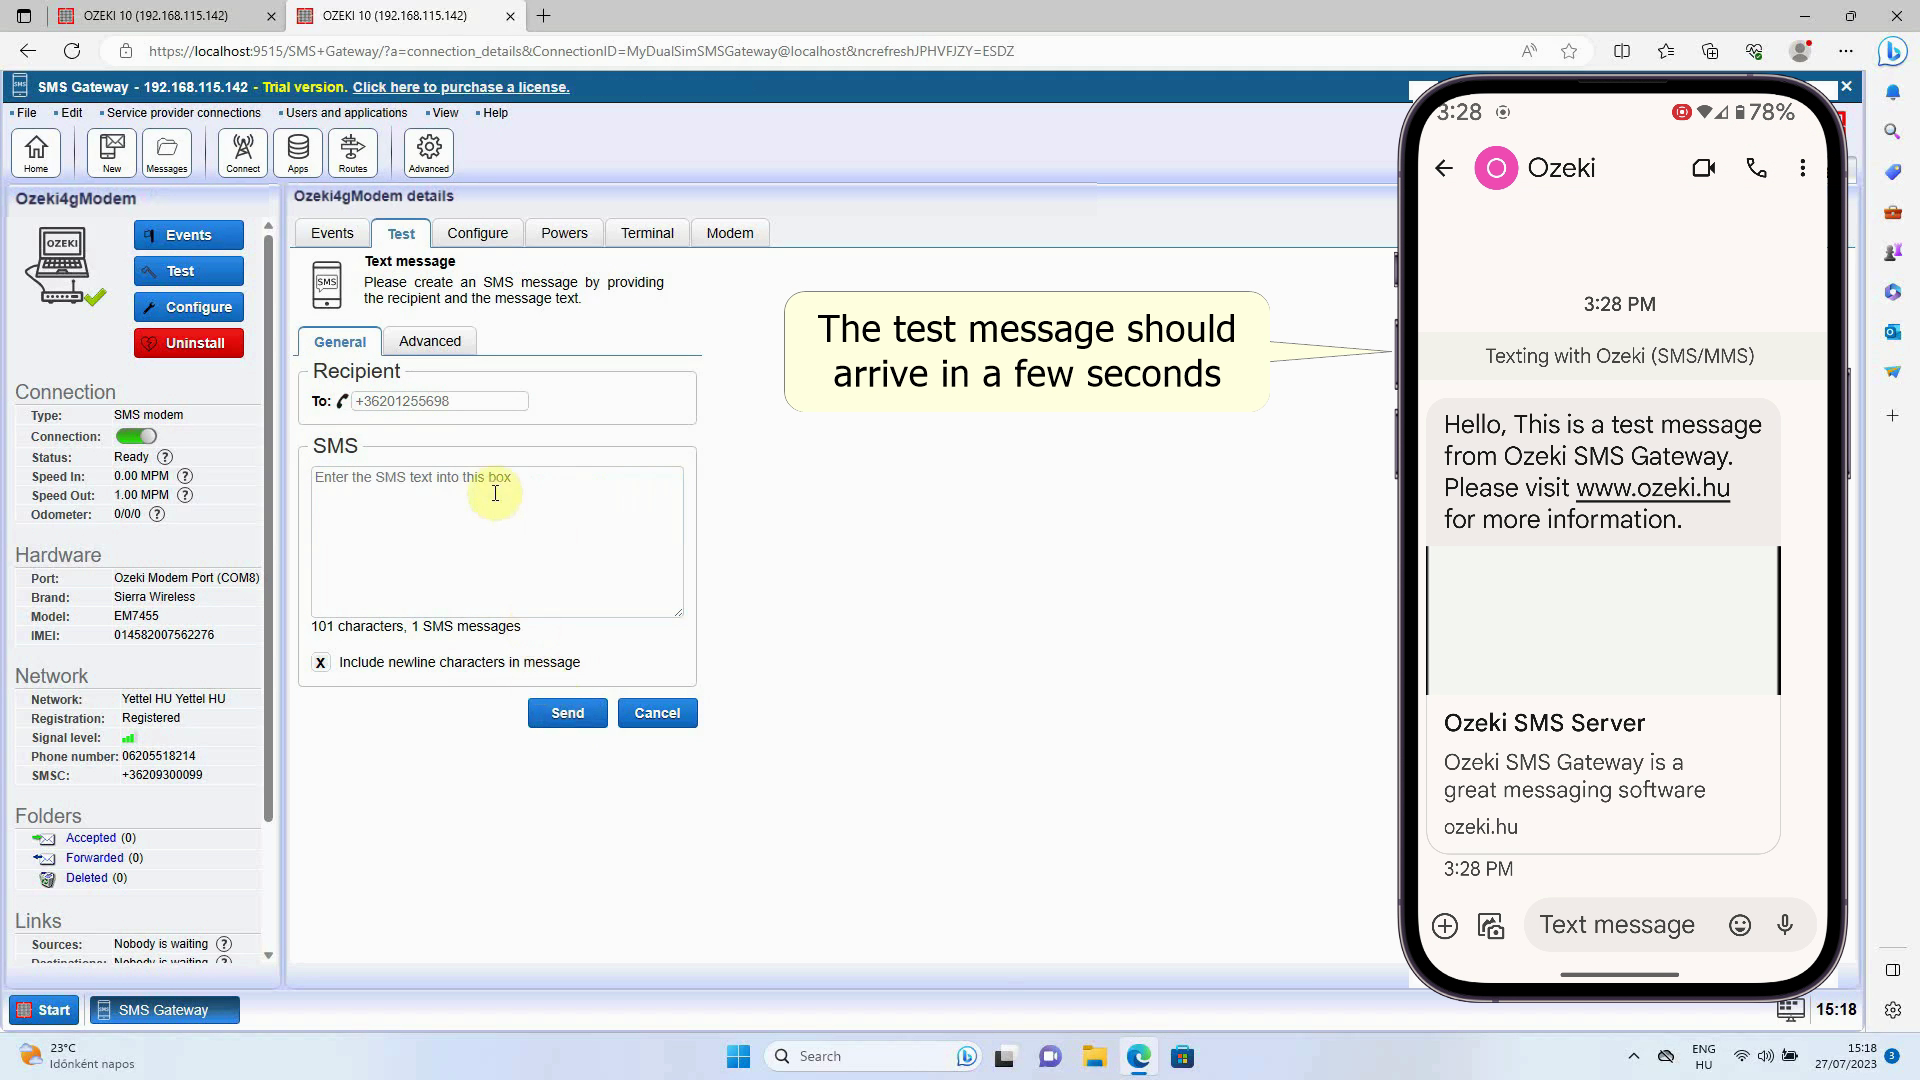
Check the test message
Check the test message on your mobile device, look for an application that handles SMS messages and open it, if you see your test message appear with the correct content, your SMS modem is working correctly, congratulation!
More information
- Home
- Quick start guide
- Manual
- Commercial

 Sign in